Overview
The Documents page is where everything you’ve uploaded or forwarded into Adminest lives. Every document is laid out as a card so you can see the headline, the AI summary, and the categories at a glance — without opening anything.
The Documents grid with category filters, search, and AI summaries on every card
Card grid
Skim summaries, categories, and source at a glance
Detail panel
Click any card to slide open the full breakdown
Bulk select
Categorise, share, or delete many at once
Finding documents
Search
The search bar at the top of the page searches across:- Document titles and senders
- Extracted text content (everything inside your PDFs and images)
- AI summaries
Filters
The filter chips along the top let you narrow the list quickly.- All — every document you have access to
- Each category — filter to one type (Insurance, Utilities, Property…). Categories you create appear here automatically.
- From email — only documents that arrived via your secure email address
View toggle
Use the Grid / List toggle in the top right to switch between the card grid (great for visual scanning) and a compact list (great when you have hundreds of documents).Uploading documents
1
Open the upload tray
Click Upload in the top right of the Documents page.
2
Drop your files
Drag one or many files in, or click to browse. You can upload PDFs, images (PNG, JPG, JPEG), and Word documents.
3
Wait a few seconds
Most documents are analysed in 10–30 seconds. You’ll see a progress badge on the new card while it works.
4
Review the AI summary
The card flips from “Processing” to the AI-generated headline once it’s done. Click it to open the detail panel.
Supported formats: PDF, PNG, JPG, JPEG, DOC, DOCX, TXT. Max size: 10 MB per file. All uploads are virus-scanned before processing.
Card anatomy
Every document card shows you, in order:- A coloured icon that reflects the document type (insurance shield, bill lightbulb, contract scroll, etc.)
- The title — usually the sender + subject, or the filename
- Source line — where the document came from (e.g. “AA Insurance · PDF · 2 days ago” or “From email · Auckland Council”)
- An AI badge — present when Adminest has finished analysing the document
- A two-line AI summary — the most important facts (amounts, due dates, policy numbers)
- Category pills — colour-coded categories. Click the + to add another, click the × on hover to remove.
The detail panel
Clicking a card slides open a panel on the right. The grid stays visible so you don’t lose your place.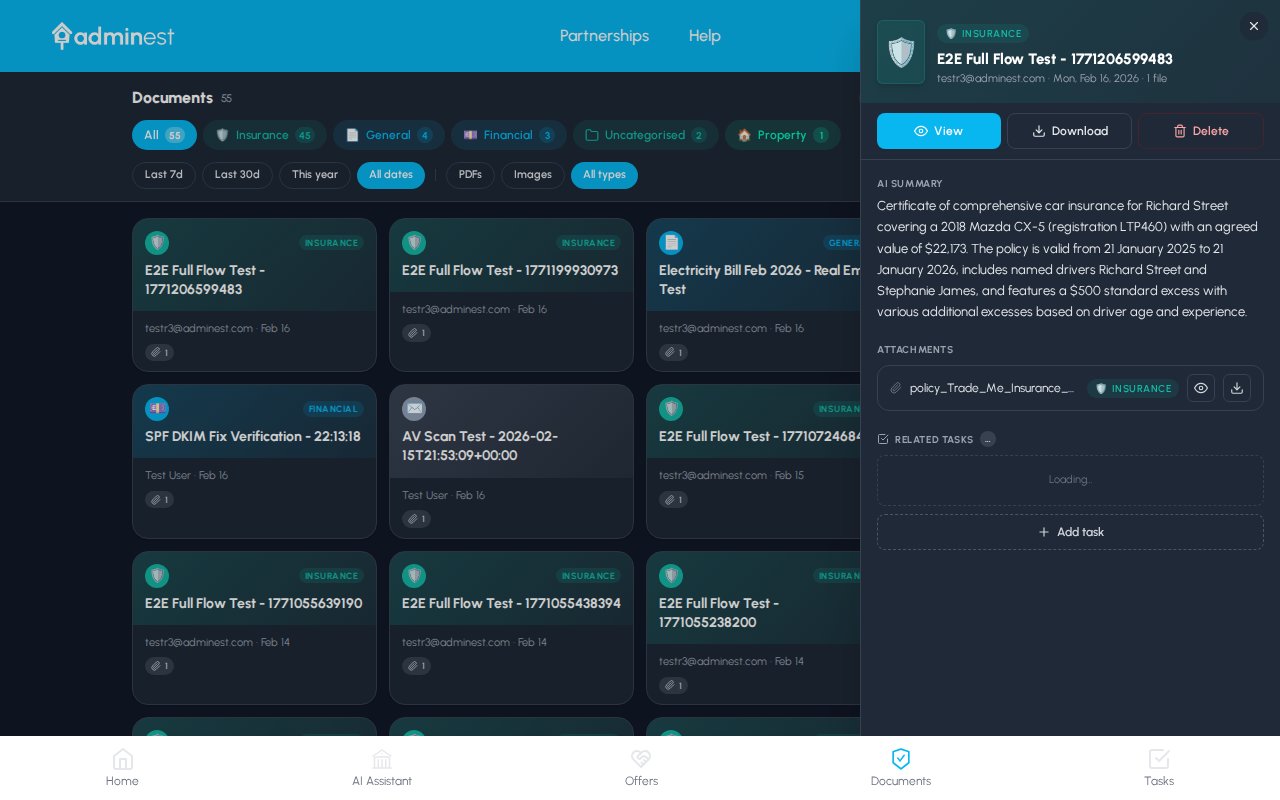
The detail panel keeps the grid in view so you can move between documents without losing context
- Read the full AI summary — a natural-language explanation of what the document is and what matters in it
- See key details as a clean key/value list (policy number, dates, amounts, account numbers)
- Add or remove categories without leaving the panel
- Open the original PDF, download a copy, or share it with one of your connections
- See and accept any suggested tasks Adminest has extracted (renewals, payment deadlines, follow-ups)
Managing categories on a card
You can edit a document’s categories without opening the detail panel.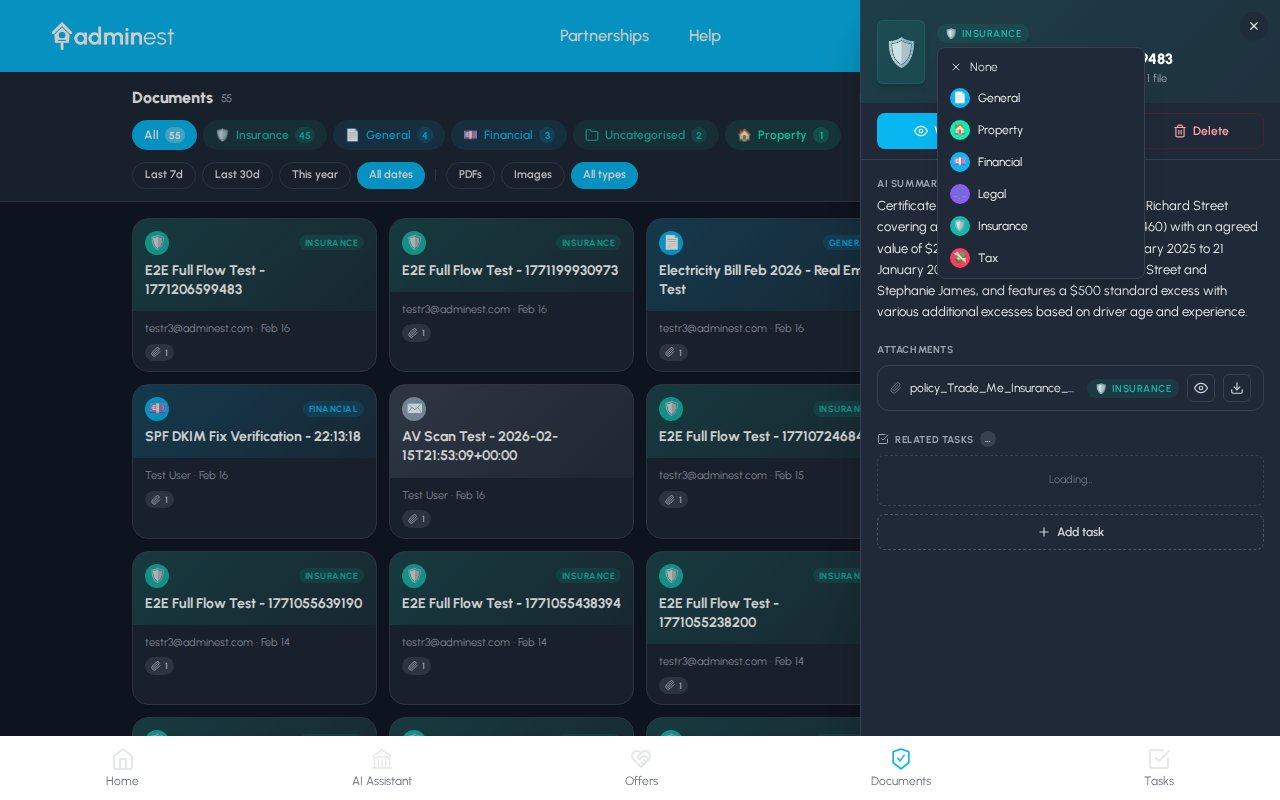
Tap the + on a card to search existing categories or create a new one on the fly
1
Click the + on the card
A dropdown appears just below the card.
2
Search or pick
Start typing — existing categories filter as you type. Click one to add it to the document.
3
Or create a new one
If nothing matches, hit Create “Name” and the new category is added instantly. You can give it an emoji and colour afterwards from Settings.
4
Remove anytime
Hover a category pill and click the × to remove it.
Categories on email groups apply to every document inside that group, and group cards show the combined set of categories from all attached documents.
Bulk actions
Hold Shift + click, or tick the checkbox on a card, to start a selection. A floating action bar appears at the bottom of the screen.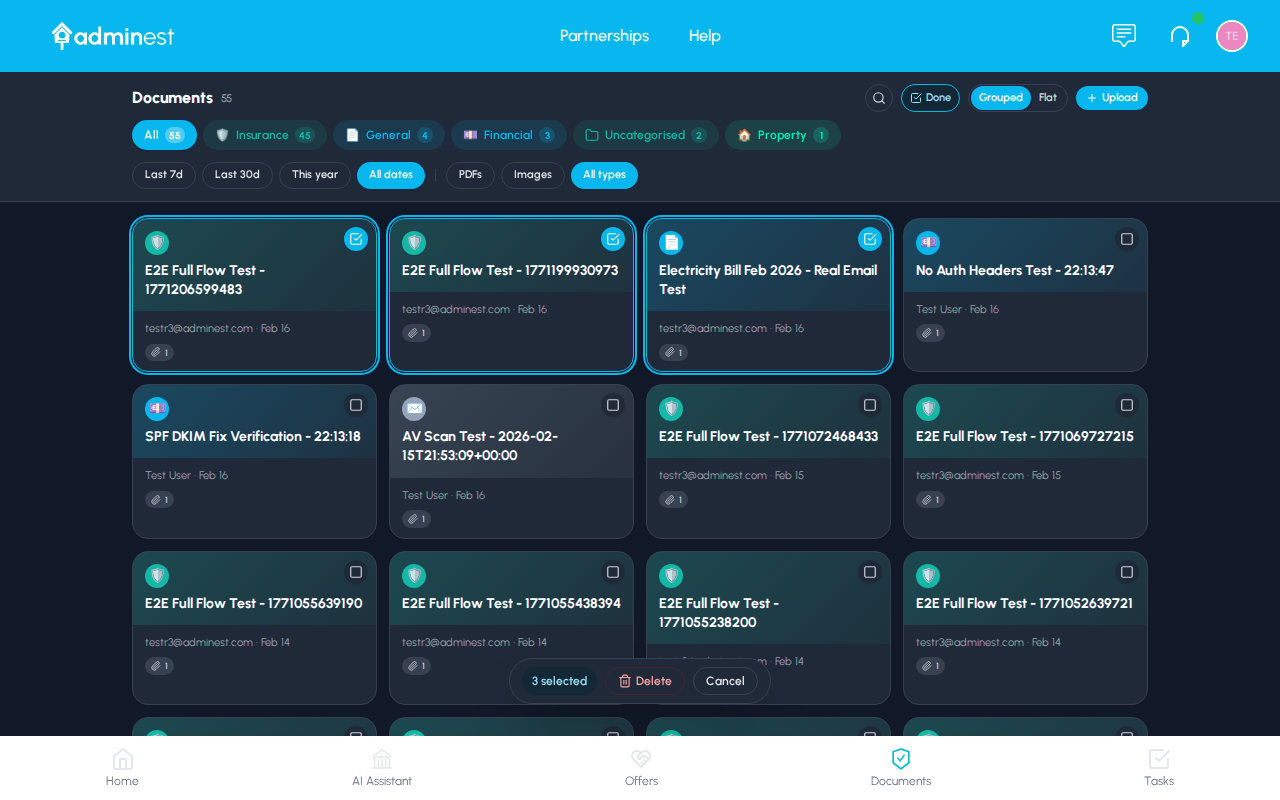
The bulk action bar appears as soon as you select more than one card
AI analysis: what gets extracted
When you upload or forward a document, Adminest automatically:- Identifies the type — insurance, bill, contract, medical letter, statement, etc.
- Extracts the key fields — names, amounts, dates, policy numbers, account numbers
- Writes a plain-English summary — a paragraph anyone in your house could understand
- Suggests tasks — renewals, payments, follow-ups, anything with a deadline
Insurance documents
Insurance documents
- Policy number and insurer
- Cover period (start and end dates)
- Annual premium and excess
- Sum insured and coverage type
- Suggested task: Renewal reminder before expiry
Bills & invoices
Bills & invoices
- Amount due and due date
- Payee / vendor name
- Account or customer number
- Usage / billing period
- Suggested task: Payment reminder a few days before the due date
Contracts
Contracts
- Parties involved
- Key dates (start, end, renewal)
- Important terms and break clauses
- Suggested task: Renewal or review reminder
Medical documents
Medical documents
- Provider and date of service
- Diagnosis or procedure
- Follow-up requirements
- Suggested task: Follow-up appointment reminder
Sharing with connections
You can share any document with a connected family member or trusted person.1
Open the document
Click the card to open the detail panel.
2
Click Share
The Share button is at the top of the detail panel.
3
Pick a connection
Choose one or more connections — they need to have accepted your connection invite first.
4
Choose permissions
View-only, or allow them to manage the related tasks too.
Best practices
Forward, don't snap
Forwarded PDFs give much cleaner extraction than phone photos of letters.
One document per file
A single PDF that contains two unrelated documents will be processed as one — split them before uploading.
Review AI dates
Glance over extracted due dates — Adminest is usually right but always worth a quick check.
Use bulk categorise
When you import a batch of old documents, select them all and apply categories in one go.
Related features
Tasks
Manage the tasks Adminest creates from your documents
Email to Document
Forward emails to bring documents in automatically
AI Assistant
Ask questions across everything you’ve uploaded
Categories
Customise your category emojis and colours